Tuesday, 28 September 2021
Saturday, 28 August 2021
Off-canvas Menu Example
Create OffCanvas menu using bootstrap 5
Sidebar.html
<link href="https://cdn.jsdelivr.net/npm/bootstrap@5.0.2/dist/css/bootstrap.min.css" rel="stylesheet" integrity="sha384-EVSTQN3/azprG1Anm3QDgpJLIm9Nao0Yz1ztcQTwFspd3yD65VohhpuuCOmLASjC" crossorigin="anonymous">
<link rel="stylesheet" type="text/css" href="offcanvas.css">
<div class="sidebar-nav">
<nav class="navbar navbar-dark bg-danger fixed-top">
<div class="container">
<!-- Mobile Menu Toggle Button -->
<button class="navbar-toggler" type="button" data-bs-toggle="offcanvas" data-bs-target="#offcanvasNavbar" aria-controls="offcanvasNavbar">
<span class="navbar-toggler-icon"></span>
</button>
<!-- Menus List -->
<div class="bg-light offcanvas offcanvas-start shadow" tabindex="-1" id="offcanvasNavbar" aria-labelledby="offcanvasNavbarLabel">
<div class="offcanvas-body">
<ul class="navbar-nav">
<li><a href="#"> <span class="item-text">Home</span></a></li>
<li><a href="#"><span class="item-text">Contact Us</span></a></li>
<li><a href="#"><span class="item-text">About Us</span></a></li>
<li><a href="#"> <span class="item-text">Products</span></a></li>
<li><hr class="dropdown-divider"></li>
<li><a href="#"><span class="item-text">Send</span></a></li>
<li><a href="#"><span class="item-text">Share</span></a></li>
<li><a href="#"><span class="item-text">Settings</span></a></li>
</ul>
</div>
</div>
<div class="btn-group " >
<a href="#" class="dropdown-toggle text-white text-decoration-none" data-bs-toggle="dropdown" aria-expanded="false">
<span class="textnone">User Name</span>
</a>
<ul class="bg-warning dropdown-menu dropdown-menu-end">
<li><button class="dropdown-item" type="button">Change Password</button></li>
<li><button class="dropdown-item" type="button">Edit Profile</button></li>
<li><button class="dropdown-item" type="button">Settings</button></li>
<li><hr class="dropdown-divider"></li>
<li><button class="dropdown-item" type="button">Sign out</button></li>
</ul>
</div>
</div>
</div>
<script src="https://cdn.jsdelivr.net/npm/bootstrap@5.0.2/dist/js/bootstrap.bundle.min.js" integrity="sha384-MrcW6ZMFYlzcLA8Nl+NtUVF0sA7MsXsP1UyJoMp4YLEuNSfAP+JcXn/tWtIaxVXM" crossorigin="anonymous"></script>
offcanvas.css
.sidebar-nav ul li a {
font-size: 26px;
text-decoration: none;
display: block;
padding: 6px 10px;
transition: 0.5s;
}
.sidebar-nav ul li a:hover {
background-color: #eeeeee;
border-radius: 4px;
}
.sidebar-nav .offcanvas {
width: 220px;
border: none;
}
.sidebar-nav .offcanvas ul li a span {
font-size: 18px;
position: relative;
top: -4px;
transition: 0.5s;
}
.sidebar-nav .offcanvas.show ul li a:hover span {
padding-left: 10px;
}
.sidebar-nav .dropdown-toggle::after {
position: relative;
top: 3px;
}
Learn all Programming with youtube.com/avadhtutor
Sunday, 15 August 2021
Happy Independence Day Code Using Html Css
Happy Independence Day Using HTML CSS
<style>
body{
background:linear-gradient(to left, orange, white, green);
animation: bg 5s infinite;
}
@keyframes bg
{
0%
{ background:linear-gradient(orange,white,green); }
50%
{ background: linear-gradient(to left, orange,white,green); }
100%
{ background:linear-gradient(to right,orange,white,green); }
}
div{
font-size: 4.5em;
padding: 10px;
text-align: center;
color: orange;
text-shadow: 15px 10px 15px green;
font-family: century gothic;
}
.happy
{
animation: happy 5s infinite;
position: relative;
}
@keyframes happy{
0%{top: 0px; color: white; text-shadow: 2px 3px 1px orange ;}
25%{top: 25px; color: green; text-shadow: 2px 2px 0px white ;}
50%{top: 50px; color: orange; text-shadow: 1px 2px 1px black ;}
75%{top: 25px; color: white; text-shadow: 2px 3px 2px green ;}
100%{top: 0px; color: green; text-shadow: 2px 3px 2px orange ;}
}
h4{
font-size: 3em;
font-family: century;
color: #e5ff00;
animation: text 5s infinite;
text-align: center;
}
@keyframes text
{
0%
{
text-shadow: 2px 2px 3px orange;
background-color: green;
}
50%
{
color: white;
background-color: orange;
}
100%
{
text-shadow: 2px 2px 3px green;
background-color: white;
}
}
</style>
<div class="happy">Happy</div>
<div class="happy">Independence</div>
<div class="happy">Day</div>
<h4>AVADH TUTOR</h4>
Saturday, 24 July 2021
Bootstrap 5 with CSS Bootstrap Login Form Design
Login Page Using Bootstrap 5 and CSS with Model Design

Example Here:
Wednesday, 14 July 2021
How to Create CSS Counter
CSS COUNTER CREATION STEP BY STEP
EXAMPLE :
<style>
body {
counter-reset: section;
background-color: DodgerBlue;
}
h2{
border:1px solid red;
background-color: tomato;
padding: 15px;
box-shadow: 1px 1px 1px 1px;
}
h2:hover{
background-color: black;
color: white;
}
h2::before {
counter-increment: section;
content: " " counter(section) " ";
color: white;
border-radius: 50%;
border-color: black;
border-style: solid;
padding-left:08px;
text-align: center;
background-color: DodgerBlue;
}
</style>
<h2> Web Design Tutorial</h2>
<h2> HTML Tutorial</h2>
<h2> CSS Tutorial</h2>
<h2> JavaScript Tutorial</h2>
<h2> Bootstrap Tutorial</h2>
<h2> Lean All Programming and Scripting Languages with Youtube.com/avadhtutor</h2>
<h2>Please Like Share and Subscribe Our Channel </h2>

learn all Programming with youtube.com/avadhtutor
Friday, 9 July 2021
Linear Gradient Using CSS
CSS Linear Gradient Example Step by Step
Just copy and past below code and run your Program
All Linear Gradient Example Listed Here:
<!-- <body style="background:linear-gradient(red,blue,yellow)"> -->
<body style="background:linear-gradient(to top left, red,blue,yellow)">
<input type=submit value=" Create Account " style="width:230px; padding:15px; background:linear-gradient(to bottom left, green, tomato, white,black,blue)">
<h1 style="background:linear-gradient(green 30%, red 30%, yellow 40% ); height:200px;">Welcome to CSS3 Gradient</h1>
<input type=submit style="background: linear-gradient(orange 30%, blue 10%, tomato 50%, black );
height:180px; width:250px; color:white; font-size:25px; border-radius:10px;">
Learn all Programming and Scripting languages with youtube.com/avadhtutor
How to Create Multi Color Background Using CSS
How to Create Multi Color Background Using CSS
Padding In CSS
How to use Padding in CSS
Margin Using CSS
How to use and Apply Margin in CSS
with avadh tutor margin property or attribute define as the space of just about an HTML tag. The margin specifies a property elements for setting the margin properties attributes in one statement. The margin-bottom specifies the bottom margin of an element (tag). The margin-top specify the top margin of an element (tag).
Examples:
<!-- Margin is Apply inside a body tag cover all over page
padding is apply inside a element (tag)
-->
<!-- <body style="margin:60px;"> -->
<body style="margin-left:30px; margin-top:100px; margin-right:50px; margin-bottom:60px;">
<p style="text-align:justify;" >Avadh Tutor is Information Technology Based channel that provide information like Html tutorial, Html5 tutorial, CSS tutorial, step by step CSS3 ,how to create website using Bootstrap, Javascript, JQuery, Angular Js, website development using PHP, step by step php mysqli, ASP.NET tutorial, C#.NET tutorial, WordPress tutorial with theme plugins widgets how to create your own theme , theme development using wordpress, how to create ecommerce online shopping website using magento, magento 2.x tutorial, UI UX, Website Designing and Website Development, software development, learn bootstrap, how to create responsive website using wordpress, how to create software using c#.net and so on with avadh tutor
<br><br>
Avadh Tutor is Information Technology Based channel that provide information like Html tutorial, Html5 tutorial, CSS tutorial, step by step CSS3 ,how to create website using Bootstrap, Javascript, JQuery, Angular Js, website development using PHP, step by step php mysqli, ASP.NET tutorial, C#.NET tutorial, WordPress tutorial with theme plugins widgets how to create your own theme , theme development using wordpress, how to create ecommerce online shopping website using magento, magento 2.x tutorial, UI UX, Website Designing and Website Development, software development, learn bootstrap, how to create responsive website using wordpress, how to create software using c#.net and so on with avadh tutor
</p>
Sunday, 13 June 2021
Wednesday, 9 June 2021
Types of CSS
TYPES OF CSS
- Inline CSS
- Multi Line CSS
- Internal CSS
- External CSS
________________________________________
INLINE CSS :
An inline CSS is used to apply a unique style to a single HTML tag or element.
Syntax: <tag style="attribute:value">-----</tag>
Example:
<p style="color:red;">welcome 123</p>
<h2 style="background-color:yellow;">hello this is a INline Style</h2>
_______________________________________________
MULTI-LINE CSS :
An Multi Line CSS is used to apply a unique style to a single HTML tag or element with Multiple CSS Attributes or Properties.
Syntax: <tag style="attribute:value; attribute:value;">------</tag>
Example :
<p style="color:white; background-color:black;">Welcome 111</p>
<a href="" style="color:orange; background-color:maroon; padding:10px; text- decoration:none;">Home</a>
_________________________________________________
INTERNAL CSS:
internal CSS is used to define a style for a single HTML page. within a <style> element
Syntax:
<style>
----- css coding ----
</style>
Example:
<style>
p
{
color:red;
}
h1{ color:yellow; background-color:black;}
b
{
color:green;
background-color:pink;
font-size:30px;
padding:12px;
}
a{color:white; background-color:black; padding:10px; font-family:'Bauhaus 93'; text-decoration:none;}
</style>
<a href="">Home</a> <a href="">Contact Us</a><br><br><br><br>
<b>youtube.com/avadhtutor</b>
<h3>Learn All Programming</h3>
<p>AVADH TUTOR</p>
<h4>Internal</h4>
<h1> CSS</h1>
________________________________________
External CSS:
this style sheet you can change the look of an entire website by changing just one file, External CSS hash two files one is create with extension .css and another file with extension .html
Example:
Create File : external.css
body{ background-color:orange; }
p{ color:blue; font-size:21px; font-family:'Britannic'; }
h1{ background-color:yellow; }
Create File : simple.html
<link href="external.css" type="text/css" rel="stylesheet">
youtube.com/avadhtutor
<h1>External StyleSheet</h1>
<p>This is Simple Example</p>
_________________________
Learn All Programming and Scripting Languages with youtube.com/avadhtutor
Learn HTML For beginners : https://www.youtube.com/watch?v=oxIsm512PdM&list=PLkx9f4H3tJMKHviDIr-BsBd_h2dVtWWf5
Learn CSS For Beginners: https://www.youtube.com/watch?v=tJWtvmRanOc&list=PLkx9f4H3tJMKDiznW8Zus-4-N0mWlfkiB
Learn CSS3 For Beginners: https://www.youtube.com/watch?v=EHczBXp-cmc&list=PLkx9f4H3tJMJ2xk5lOUsfpexF0IH3_sOA
Simple Border Attribute Example Using CSS
Simple Border Attribute Example Using CSS
(Just Copy and past This Code to Your Editor like NotePad, SubLime, Atom, VS etc...)
Example 1: Using Border Style and Width Properties
<a href="" style="border-style:dotted; border-width:2px; ">Home</a>
<a href="" style="border-style:solid; border-width:3px; border-color:red;">Contact Us</a>
Example 2: Using Border Color and Style Properties
<p style="border-color:blue; border-style:inset; ">welcome 123</p>
<span style="border-color:blue; border-style:inset;">welcome 111</span>
Example 3: General Example
<p style="border-top-color:red; border-top-style:dotted; border-top-width:3px;
border-bottom-color:green; border-bottom-style:groove; border-bottom-width:4px;
border-right-color:orange; border-right-style:solid;
border-left-color:tomato; border-left-style:outset; ">welcome to Border Attribute</p>
How to create Background image and color using CSS Step by step Example
How to Create Background Image and Color Using CSS Step By Step
Example 1: Using HTML
<body background="nature.jpg">
Example 2: Using CSS with No-Repeat Attribute
<body style="background-image:url('nature.jpg'); background-repeat:no-repeat;">
Example 3: Using CSS Repeat Image Width Wise
<body style="background-image:url('nature.jpg'); background-repeat:repeat-x;"> -->
Example 4: Using CSS Repeat Image as Height Wise
<body style="background-image:url('nature.jpg'); background-repeat:repeat-y;">
_________________________________
Example 5: Using HTML Apply Background Color
<p bgcolor=red>welcome 123</p>
Example 6: Using CSS Apply Background Color
<p style="background-color:red;">welcome 123</p>
<p style="color:blue; background-color:yellow;">Hello this is a Color Attribute</p>
Example 7: General Example
<p style="background-image: url('1.png');">welcome <br>
Hello this is<br> welcome 123<br> aksjdk sdkj kasjklkl asljaskljkl askl </p>
<span style="background-image:url('1.png');">welcome to css<br> hello this is a test<br> cascading style sheet</span>
__________________________
Learn All Programming and Scripting Languages with youtube.com/avadhtutor
Learn HTML: https://www.youtube.com/watch?v=oxIsm512PdM&list=PLkx9f4H3tJMKHviDIr-BsBd_h2dVtWWf5
Learn CSS: https://www.youtube.com/watch?v=tJWtvmRanOc&list=PLkx9f4H3tJMKDiznW8Zus-4-N0mWlfkiB
learn CSS 3: https://www.youtube.com/watch?v=EHczBXp-cmc&list=PLkx9f4H3tJMJ2xk5lOUsfpexF0IH3_sOA
___________________________
Tuesday, 6 April 2021
2 4 8 32 256 ...n series in php
2 4 8 32 256 ...n series in php
<title>1,2,2,4,8,32,256.....n</title>
<?php
/* 1,2,2,4,8,32,256.....n */
$a=1;
$b=2;
$c=0;
$l=0;
while($l<=5)
{
$c=$a*$b;
print"<br>".$c;
$a=$b;
$b=$c;
$l++;
}
?>
Tuesday, 30 March 2021
1,2,4,7,11,16...n series in php step by step
1,2,4,7,11,16...n in PHP
<?php
/* 1,2,4,7,11,16...n. */
$l=1;
$a=1;
$b=1;
while($l<=10)
{
print"<br>".$a;
$a=$b+$a;
$b++;
$l++;
}
?>
1,1,2,3,5,8,13,21....n || Fibonacci series in php
1,1,2,3,5,8,13,21....n Series in PHP Example
<?php
/* 1,1,2,3,5,8,13,21....n. */
$a=1;
$b=0;
$c=0;
$l=1;
while($l<=10)
{
$c=$a+$b;
print"<br>".$c;
$a=$b;
$b=$c;
$l++;
}
?>
Write a program to print square and also print sum of the number ||
Print square and also print sum of the number in PHP
1,4,9,16,25,36 in php || sum of series in php program
SUM OF SERIES IN PHP
<?php
/* 1,4,9,16,25,36....n.*/
$a=1;
$b=0;
while($a<=10)
{
$b=$a*$a;
print"<br>".$b;
$a++;
}
?>
OUTPUT : 1,4,9,16,25,36
Friday, 19 March 2021
check enter value if character or digit or Special Symbol using php
check enter value if character or digit or Special Symbol using php
Write a program to Find Vowel or Not Vowel in PHP
Write a program to Find Vowel or Not Vowel in PHP
<title>Write a program to Find Vowel or Not Vowel in PHP</title>
</head>
<body>
<?php
/* Write a program to get the one character from user and find out
this character is vowel or not.*/
$x='a';
if($x=='a'|$x=='e'|$x=='i'|$x=='o'|$x=='u'|$x=='A'|$x=='E'|$x=='I'|$x=='O'|$x=='U')
{
print"Vowel";
}
else
{
print"Not Vowel";
}
?>
Thursday, 18 March 2021
Write a program to accept any year four digits and check whether it is leap year or not
Write a program to accept any year four digits and check whether it is leap year or not
<title>Write a program to accept any year four digits and check whether it is leap year or not</title>
<?php
/* Write a program to accept any year four digits and check
whether it is leap year or not.*/
$y=2000;
if($y%4==0)
{
print"Leap Year";
}
else
{
print"Not Leap Year";
}
?>
Write a program to accept any number and check wether it is divisible by 9 ot not
Write a program to accept any number and check wether it is divisible by 9 ot not
<title>Write a program to accept any number and check wether it is divisible by 9 ot not</title>
<?php
/* Write a program to accept any number and check wether it is
divisible by 9 ot not.*/
$n=3;
if($n%9==0)
{
print"Divisible";
}
else
{
print"Not Divisible";
}
?>
Thursday, 4 March 2021
Write a program that reads 10 element in array enter a number and find how many times the number is repeated in the list in PHP
Write a program that reads 10 element in array enter a number and find how many times the number is repeated in the list In PHP
Example:
<title>PHP:Write a program that reads 10 element in array enter a number and find how many times the number is repeated in the list </title>
<?php
/* Write a program that reads 10 element in array enter a number and find how many times the number is repeated in the list.*/
$n=array(1,2,9,4,5,9,7,8,9,10,9);
$sv=9;
$count=0;
for($a=1;$a<=10;$a++)
{
if($n[$a]==$sv)
{
$count++;
}
}
print"Searching values is found times = ".$count."<br>";
?>
</body>
</html>
Write a program that reads 10 element in array count how many zero how many positive and how many negative values in php
<title>PHP : Write a program that reads 10 element in array count how many zero how many positive and how many negative values</title>
EXAMPLE:
<?php
/* Write a program that reads 10 element in array count how many zero how many positive and how many negative values.*/
$n=array(1,-2,3,-4,5,-6,7,8,9,10,0);
$b=0;
$c=0;
$d=0;
for($a=1;$a<=10;$a++)
{
if($n[$a]<0)
{
$b++;
}
if($n[$a]>0)
{
$c++;
}
if($n[$a]==0)
{
$d++;
}
}
print"Positive Number = ".$b."<br>";
print"negative Number = ".$c."<br>";
print"Zero Number = ".$d;
?>
OUTPUT:
Positive Number = 3
negative Number = 6
Zero Number = 1
Write a program that reads 10 element in array count how many odd values and how many even values in the list in php
Write a program that reads 10 element in array count how many odd values and how many even values in the list in php
Even Number = 6
Write a program that reads 10 element and print all even values form them Using PHP
Write a program that reads 10 element and print all even values form them Using PHP
Example:
<title>PHP: Write a program that reads 10 element and print all even values form them Using PHP</title>
<?php
/* Write a program that reads 10 element and print all even values form them.*/
$n=array(1,2,3,4,5,6,7,8,9,10);
for($a=1;$a<=10;$a++)
{
if($n[$a]%2==0)
{
print"<br>"."Odd Number = ".$n[$a];
}
}
?>
OUTPUT:
Even Number = 2
Even Number = 4
Even Number = 6
Even Number = 8
Even Number = 10
Write a program that reads 10 element and print all odd values from them using php
Write a program that reads 10 element and print all odd values from them using php
Example:
<title>PHP: Write a program that reads 10 element and print all odd values from them </title>
<?php
/* Write a program that reads 10 element and print all odd values from them.*/
$n=array(1,2,3,4,5,6,7,8,9,10,11);
for($a=1;$a<=10;$a++)
{
if($n[$a]%2!=0)
{
print"<br>"."Odd Number = ".$n[$a];
}
}
?>
OUTPUT:
Odd Number = 1
Odd Number = 3
Odd Number = 5
Odd Number = 7
Odd Number = 9
Odd Number = 11
Wednesday, 3 March 2021
Write a program to sort array of elements using bubble sort Using PHP
Write a program to sort array of elements using bubble sort
Example :
<title>PHP : Write a program to sort array of elements using bubble sort.</title>
<?php
/* Write a program to sort array of elements using bubble sort. */
$n=array(9,8,7,6,5,4,3,2,1,0);
$temp=0;
for($b=0;$b<=9;$b++)
{
if($n[$b]<$n[$b-1])
{
$temp=$n[$b];
$n[$b]=$n[$b-1];
$n[$b-1]=$temp;
}
}
print"After Sorting";
for($a=0;$a<=8;$a++)
{
print"<br>".$n[$a];
}
?>
8
7
6
5
4
3
2
1
0
Write a program to get 10 student mark from user and sort it in ascending order using php
Write a program to get 10 student mark from user and sort it in ascending order
Example :
<title>Write a program to get 10 student mark from user and sort it in ascending order</title>
<?php
/* Write a program to get 10 student mark from user and sort it in ascending order. */
$n=array(2,1,5,6,4,3,0,8,9,7);
for($a=0;$a<=9;$a++)
{
for($b=$a+1;$b<=9;$b++)
{
if($n[$a]>$n[$b])
{
$temp=$n[$a];
$n[$a]=$n[$b];
$n[$b]=$temp;
}
}
}
print"Asending Number";
for($a=0;$a<10;$a++)
{
print"<br>".$n[$a];
}
?>
Write a program to get 10 number from user & find and min number in php
Write a program to get 10 number from user & find and min number and Maximum Numbers using PHP
Write a program to get the 10 values for user & calculate sum and average using php
Write a program to get the 10 values for user & calculate sum and average.
2
3
4
5
6
7
8
9
10
Sum = 55
Avrage = 5.5
Friday, 26 February 2021
WIFI Enabled, Bluetooth ON OFF, Flash Light ON OFF and Vibrating a Phone Using Android
Program Listed Here
Download Link is Bottom Side of Page
package com.example.classworkapk;
import android.app.Activity;
import android.bluetooth.BluetoothAdapter;
import android.content.Context;
import android.hardware.Camera;
import android.net.wifi.WifiManager;
import android.os.Bundle;
import android.os.Vibrator;
import android.view.Menu;
import android.view.View;
import android.view.View.OnClickListener;
import android.widget.Button;
import android.widget.Toast;
import android.view.Menu;
public class MainActivity extends Activity {
Button b1, b2, w1, w2, f1, f2, v1;
Camera cm;
Vibrator vi;
@Override
protected void onCreate(Bundle savedInstanceState) {
super.onCreate(savedInstanceState);
setContentView(R.layout.activity_main);
//Bluetooth Code
b1 = (Button) findViewById(R.id.button1);
b2 = (Button) findViewById(R.id.button2);
final BluetoothAdapter mBluetoothAdapter = BluetoothAdapter.getDefaultAdapter();
b1.setOnClickListener(new OnClickListener() {
@Override
public void onClick(View arg0) {
// TODO Auto-generated method stub
if (!mBluetoothAdapter.isEnabled()) {
mBluetoothAdapter.enable();
Toast.makeText(getApplicationContext(), "Bluetooth Enable", Toast.LENGTH_LONG).show();
}
else{
Toast.makeText(getApplicationContext(), "Bluetooth Al-Ready Enable", Toast.LENGTH_LONG).show();
}
}
});
b2.setOnClickListener(new OnClickListener() {
@Override
public void onClick(View arg0) {
if (mBluetoothAdapter.isEnabled()) {
mBluetoothAdapter.disable();
Toast.makeText(getApplicationContext(), "Bluetooth Disable", Toast.LENGTH_LONG).show();
}
else{
Toast.makeText(getApplicationContext(), "Bluetooth Al-Ready Disable", Toast.LENGTH_LONG).show();
}
}
});
// Wi - Fi Code
w1 = (Button) findViewById(R.id.button3);
w2 = (Button) findViewById(R.id.button4);
final WifiManager wifi = (WifiManager) getSystemService(Context.WIFI_SERVICE);
w1.setOnClickListener(new OnClickListener() {
@Override
public void onClick(View arg0) {
wifi.setWifiEnabled(true);
Toast.makeText(getApplicationContext(), "Wi-Fi On", Toast.LENGTH_LONG).show();
}
});
w2.setOnClickListener(new OnClickListener() {
@Override
public void onClick(View arg0) {
wifi.setWifiEnabled(false);
Toast.makeText(getApplicationContext(), "Wi-Fi Off", Toast.LENGTH_LONG).show();
}
});
//Flash Light Code
f1 = (Button) findViewById(R.id.button5);
f2 = (Button) findViewById(R.id.button6);
cm = Camera.open();
final Camera.Parameters parameters = cm.getParameters();
f1.setOnClickListener(new View.OnClickListener() {
@Override
public void onClick(View v) {
parameters.setFlashMode(Camera.Parameters.FLASH_MODE_TORCH);
cm.setParameters(parameters);
cm.startPreview();
Toast.makeText(getApplicationContext(), "Flash Light ON", Toast.LENGTH_LONG).show();
}
});
f2.setOnClickListener(new View.OnClickListener() {
@Override
public void onClick(View v) {
parameters.setFlashMode(Camera.Parameters.FLASH_MODE_OFF);
cm.setParameters(parameters);
cm.startPreview();
Toast.makeText(getApplicationContext(), "Flash Light Off", Toast.LENGTH_LONG).show();
}
});
// Vibrate Code
v1 = (Button) findViewById(R.id.button7);
vi = (Vibrator) getSystemService(VIBRATOR_SERVICE);
v1.setOnClickListener(new OnClickListener() {
@Override
public void onClick(View arg0) {
vi.vibrate(1000);
Toast.makeText(getApplicationContext(), "Device Vibrate", Toast.LENGTH_LONG).show();
}
});
}
@Override
public boolean onCreateOptionsMenu(Menu menu) {
// Inflate the menu; this adds items to the action bar if it is present.
getMenuInflater().inflate(R.menu.main, menu);
return true;
}
}
Download Load Source Code https://classroom.google.com/c/MjQ5MjA3MzAzNDE3/m/Mjg1MzE2NzMwMzA4/details
Friday, 19 February 2021
how to insert Gujarati character in c#.net with SQL Server database
How to Insert Gujarati, Hindi, Marathi, Urdu etc ... characters or string using C#.Net with SQL Server
(YOUTUBE VIDEO : https://youtu.be/TyyAnvaZCy0)
Steps to Store languages in database:
1.Install Google Input Tool
2. Choose Your language inside a Google Input
3. Create a Database
4. Create a Table with NVarchar Data Type
5. Create a Your Window Form
6. Click on Button Then Insert data inside a database
7. Query:
insert into tablenm values(N'"+TEXTBOX NAME+"')
N is used to Insert Any Character
Example:
1. Window Form


3. Button Click Then Save data
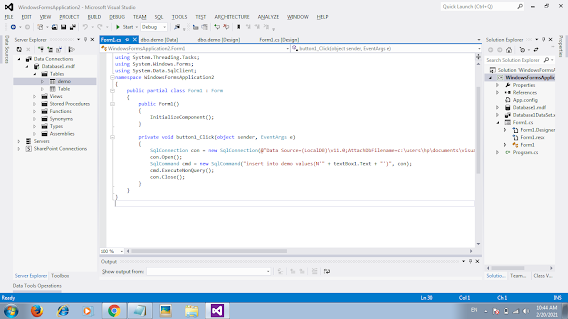
Source code of CS File Listed here
(YOUTUBE VIDEO : https://youtu.be/TyyAnvaZCy0)
Tuesday, 2 February 2021
JavaScript validations || Form validation name, mobile, email, password using javaScript
JAVA SCRIPT VALIDATIONS
NAME, USER ID, PASSWORD VALIDATION USING JAVASCRIPT EXAMPLE
Example:
<script>
function validation()
{
var pass = form.pass.value;
var pass2= form.pass2.value;
if(document.form.name.value=="")
{
alert("Please Enter Your Name");
return false;
}
if(document.form.userid.value.length<=3)
{
alert("PLEASE ENTER VALID USER ID ");
return false;
}
if(document.form.userid.value.length>10)
{
alert("Please enter UserId Should less Character Length");
return false;
}
if(pass != pass2)
{
alert("Both Password Are Not Matched");
return false;
}
if(!document.form.agree.checked)
{
alert("Please Check agree button");
return false;
}
return true;
}
</script>
<form name="form" onSubmit="return validation();" method="post" action="testing.html">
<table width="322" border="1">
<tr>
<td width="147">Name</td>
<td width="159"><input type="text" name="name" value=""></td>
</tr>
<tr>
<td>User Id</td>
<td><input type="text" name="userid" value=""></td>
</tr>
<tr>
<td>Password</td>
<td> <input type="text" name="pass" value=""></td>
</tr>
<tr>
<td>Confirm Password </td>
<td><input type="text" name="pass2" value=""></td>
</tr>
<tr>
<td>Agree</td>
<td><input type="checkbox" name="agree"></td>
</tr>
<tr>
<td><input type="submit" value=" Register "></td>
<td><input type="reset" value=" Field Blanker "></td>
</tr>
</table>
</form>
__________________________________________________
JAVA SCRIPT EMAIL VALIDATION:
<input id="textEmail">
<button type="button" onclick="myFunction()">Submit</button>
<p id="demo" style="color: red;"></p>
<script>
function myFunction() {
var email;
email = document.getElementById("textEmail").value;
var reg = /^([A-Za-z0-9_\-\.])+\@([A-Za-z0-9_\-\.])+\.([A-Za-z]{2,4})$/;
if (reg.test(textEmail.value) == false)
{
document.getElementById("demo").style.color = "red";
document.getElementById("demo").innerHTML ="Invalid EMail ->"+ email;
alert('Invalid Email Address ->'+email);
return false;
} else{
document.getElementById("demo").style.color = "DarkGreen";
document.getElementById("demo").innerHTML ="Valid Email ->"+email;
}
return true;
}
</script>
_________________________________________________
ENTER ONLY NUMBERS VALIDATION USING JAVASCRIPT
<script>
function num()
{
n = frm.nm.value;
if(isNaN(n)) //none of numeric character
{
alert("Please Enter Only Numbers");
return false;
}
else if(frm.nm.value.length<10)
{
alert("Enter Proper Mobile Number");
return false;
}
else
{
alert("Success");
return true;
}
}
</script>
<form onsubmit="return num();" name=frm>
<input type=text name=nm value="" placeholder="Mobile">
<br>
<input type=submit value=" Confirm ">
</form>
__________________________________________________
Learn All Programming and Scripting Languages with youtube.com/avadhtutor
Wednesday, 27 January 2021
java script built-in function
JAVASCRIPT STRING FUNCTION
<script>
s1="avadhtutor";
s2="Javascript";
document.write(s1);
//convert your string as bold or strong using .bold() function
document.write(s1.bold()+ "<br>");
//convert your string as italics using .italics() function
document.writeln("<br>italics = " + s1.italics());
//convert your string as capital letter, converts a string to uppercase letters
document.writeln("<br>This is Upper Case = " + s1.toUpperCase());
//convert your string as Small letter, converts a string to LowerCase letters
document.writeln("<br>"+s1.toLowerCase());
//returns the character at the specified index in a string
document.writeln("<br>charAt = " + s1.charAt(4));
//merge a string using concat() function
document.writeln("<br>concat = "+ s1.concat(s2));
//returns the position of the first occurrence of a specified value in a string
document.writeln("<br>index of = " + s1.indexOf('i'));
document.writeln("<br>index of = " + s1.indexOf('a'));
//returns the position of the Last occurrence of a specified value in a string
document.writeln("<br>last index of = " + s1.lastIndexOf('i'));
//extracts parts of a string, beginning at the character at the specified position, and returns //the specified number of index
document.writeln("<br>substr = " + s2.substr(2,4));
//first is index and last is char position
document.writeln("<br>substring = " + s1.substring(3,4));
//method searches a string for a specified value, and returns the position of the match. The //search value can be string or a index
document.writeln("<br>search = " + s2.search("v")); //character wise search index
//returns a new string where the specified values are replaced.
document.writeln("<br>replace = " + s2.replace("v","j"));
</script>
___________________________________________________
JAVA SCRIPT MATH FUNCTION
<script >
//abs(): return positive value
document.writeln("<br>abs = " + Math.abs(-2.10));
//returns the value of x to the power of y (xy)
document.writeln("<br>Pow = " + Math.pow(3,3));
//create a proper random function to use for all random integer purposes
document.writeln("<br>Random = " + Math.random());
// rounds a number to the nearest integer
document.writeln("<br>Round = " + Math.round(124.900));
//method rounds a number UPWARDS to the nearest integer
document.writeln("<br>Ceil = " + Math.ceil(2.99));
document.writeln("<br>Ceil = " + Math.ceil(-12.999));
//method rounds a number DOWNWARDS to the nearest integer
document.writeln("<br>Floor = " + Math.floor(11.5));
document.writeln("<br>Floor = " + Math.floor(-11.999));
//returns the number with the highest value
document.writeln("<br>Max = " + Math.max(15,20,10,50,5,120,1));
document.writeln("<br>Max = " + Math.max(-15,-20));
//returns the number with the lowest value
document.writeln("<br>Min = " + Math.min(15,20,10,50,3));
document.writeln("<br>Min = " + Math.min(-15,-20));
//returns the square root of a number
document.write("<br>square root" +Math.sqrt(144));
document.write("<br>Square root"+ Math.sqrt(81));
document.write("<br>Square root"+ Math.sqrt(625));
</script>
_________________________________________
DATE & TIME FUNCTION IN JAVASCRIPT
<script>
var t = new Date();
//get full system time
document.write("Get Full Time:"+ t.getTime() + "<br />");
//get current hours of system
document.write("Get Houurs" +t.getHours()+ "<br />");
//get current Minutes of system
document.write("Get Minutes" + t.getMinutes() + "<br />");
//Get Current System Seconds
document.write("Get Seconds " + t.getSeconds() + "<br />");
//Get Current MiliSeconds
document.write("Get MilliSeconds" +t.getMilliseconds() + "<br>");
//return integer day values
document.write("Get Day " + t.getDay() + "<br />");
//return integer month values
document.write("Get Month " + t.getMonth() + "<br />");
//get four digit full year
document.write("Get Year " + t.getFullYear() + "<br />");
</script>
___________________________________________
JAVASCRIPT ARRAY FUNCTION
<script >
//join(): join or merge or conacat two or more array using join() function
var arr = new Array();
arr[0] = "All";
arr[1] = "Programming";
arr[2] = "Avadh ";
arr[3] = "Tutor";
document.write(arr +"<br> ");
document.write(arr[0]+"<br>");
document.write(arr.join() + "<br />");
document.write("Name:"+arr.join("<br>Name:"));
</script>
___________
<script type="text/javascript">
//delete array element runtime using pop() array function, delete last element using POP()
var arr = new Array();
arr[0] = "Learn";
arr[1] = "All";
arr[2] = "Programming";
arr[3] = "With";
arr[4] = "youtube.com/avadhtutor";
document.write("<br><br>"+arr + "<br />");
document.write(arr.pop() + "<br />");
document.write(arr+"<br>");
document.write(arr.pop() + "<br />");
document.write(arr+"<br>");
document.write(arr.pop() + "<br />");
document.write(arr+"<br>");
</script>
__________________________
<script type="text/javascript">
//push() : is used to insert or new elements inside a array using push() function
var arr = new Array(3);
arr[0] = "Scripting";
arr[1] = "Languages";
arr[2] = "youtube.com/avadhtutor/playlists";
document.write("<br><br><br>" +arr + "<br />");
document.write(arr.push("jay") + "<br />");
document.write(arr+"<br>");
</script>
Learn all
Programming and Scripting
Languages with
youtube.com/avadhtutor/playlists